To start, if your yarn hasn't already been skeined, you need to do so. I usually skein mine around two of my bedposts, because it's exactly 3 feet apart, and I recycle a lot of sweaters and I like to know the yardage of my yarn. The yarn I dyed this time was purchased: 850 yards of Sappho I from Sanguine Gryphon. (I forgot to add more ties on it- my yarn came with 3, 6 would probably be better, as the yarn gets handled a lot during the dye process)
Because I was dyeing with food coloring, I soaked my yarn in a bucket of water with a slosh of vinegar (I didn't really measure how much, sorry) This yarn is 100% wool, and I soaked it for around 45 minutes.
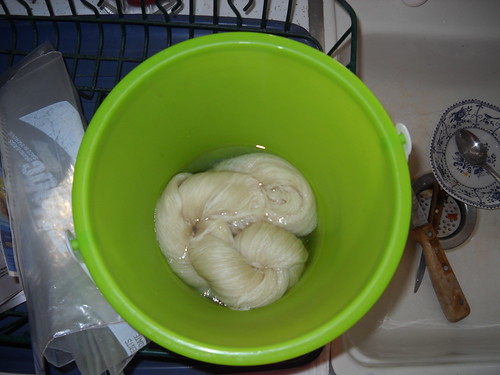
As you can see above, I use a lovely sand pail that I got for $1 at Michael's at the end of the summer. This one I keep separate and clean for soaking yarn (I have others for actual sand use, lol)
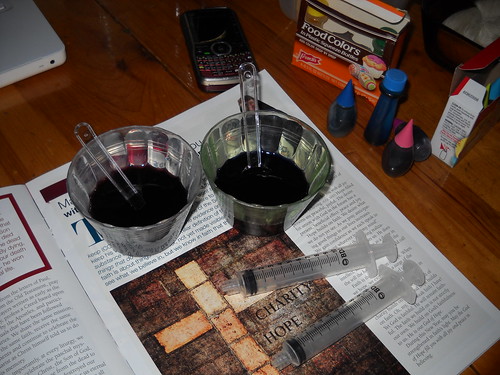
At my last dyeing session, I was visiting my cousin and dyeing yarn with her 3 oldest kids. She is a nurse, and conveniently had a bunch of old syringes that she let me have to use for my dyeing. This is how I put the dye on the yarn. I mixed up my dyes using recipes from Dye Your Yarn for McCormick food coloring. I used the neon pack- neon purple and neon pink, plus the blue from a regular pack. Raspberry: 1 pink (or red) to 3 purple, Purple: 1 blue to 3 purple.

Since the skein of yarn wasn't super big, I used my battered 7"x11" pan ( I think that's the size...) As you can see above, it fits really well in the microwave, which I think is a big plus. (Our microwave is supposed to be big enough to hold a 9x13, but I think this one fits more comfortably)

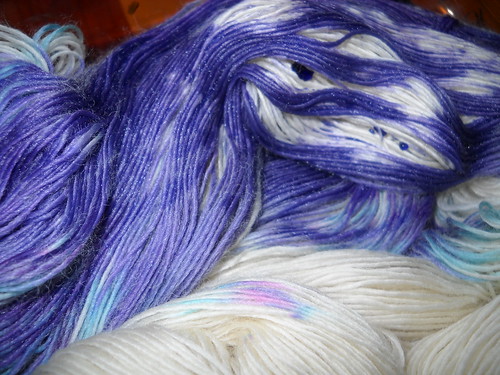

As you can see above, I simply divided the skein in half (okay, not simply, but roughly). I started on the purple side, and in the second photo, you can see where the purple dye separated a little bit. I really liked this affect, but I was originally going for a more solid skein with half purple and half raspberry. The bottom picture is from the first round of dyeing. This was one batch of dye, 2 colors, each in approximiately 1/2 cup of water. All the dyeing help I've read said that the amount of water doesn't matter, it's the amount of dye that matters. Hence the small amount of water. I actually love the McCormick food colors, especially in comparison to Kool-Aid. The McCormick already comes as a liquid, where the Kool-Aid you must dissolve in water first (thus needing more water). But, if you are just starting out dyeing, Kool-Aid may be a safer and easier experiment (and it smells better because you don't need the vinegar)
About the vinegar: food colors need an acid to help them bond to the wool. For Kool-Aid, it's citric acid, which is already in the drink mix. When you use either Wilton's or McCormick, you need to add an acid, and the one that is usually in most household is vinegar. I used white vinegar for this run.
For this skein, I ended up making at least ten batches of dye, both colors, to achieve the colors I wanted. Even then, the colors were not completely saturated. I'll advise you to be more careful and less impatient than I was, as this was not superwash wool, and there is the possibility of it felting if it starts to boil.
Every 3rd or 4th pass through the microwave, I drained off the access water, as if it built up, there was more chance of the dye moving around. Also, to be sure I had enough vinegar to help the process, either the 5th or 6th round of dye was 60% vinegar. In this round, I filled my little dye cups halfway with vinegar, added a bit more water, then added the dye. I'm not sure if it made any difference, but I felt better about it.
After finishing, I let the yarn cool- be careful not to shock the yarn by rinsing it in cold water- I used lukewarm water to help bring it down to handling temperature, and ran it under a lukewarm faucet to rinse out any dye that had not taken. Rubber gloves are great for this.
It took a bit to dry, and this is where my impatience hits. I started by rolling it in a towel and stomping on it, followed by hanging it in front of a heater, and the list goes on. What ended up being most helpful was the heat in my car. Obviously, you don't need to use this method, but I wanted to use my yarn ASAP.
When my camera battery died, my sister started taking photos with her camera, and for some reason, I can't get them on here. So here is the photoset that she uploaded to flickr: more pictures.
I hope this is a semi- helpful tutorial. Feel free to offer suggestions! I hope you have fun dyeing your yarn with food coloring!
You can see the finished product of the yarn here (or at least the beginning of it).
No comments:
Post a Comment
I love knowing that you stopped by!
~ Mary